Air ducts play a pivotal role in maintaining the comfort of your home, distributing warm or cool air throughout your space. Like any system, they’re prone to wear and tear, and sometimes, a duct may disconnect, leading to inefficiencies and even a spike in energy bills. Whether caused by house settling, poor installation, or inadvertent nudging during other home repairs, a disconnected air duct is a problem that needs prompt attention.
How do you fix a disconnected air duct? Below is a guide to help you solve the problem.
Identifying a Disconnected Air Duct
Before jumping into the repair, it’s essential to confirm the issue. Signs include:
- Uneven heating or cooling in rooms.
- A noticeable increase in energy bills.
- Hearing the sound of air escaping or a distinct whistling noise.
- Visibly spotting a disconnect upon inspection of the ductwork.
Fixing a Disconnected Air Duct: A Step-by-Step Guide
Step 1: Safety First
Turn Off the HVAC System: Before starting any repair, ensure the HVAC system is turned off to prevent any air flow and to work safely.
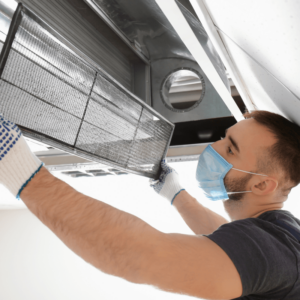
Wear Protective Gear: Put on gloves and a dust mask, as ducts can be dusty, and you might encounter insulation.
Step 2: Access the Disconnected Area:
Depending on where the disconnect has occurred, you might need to access the duct via crawl spaces, basements, or attics. Ensure you have ample lighting to work.
Step 3: Inspect the Damage
Once you’ve located the disconnect, inspect it to determine the extent of the issue. Sometimes, the duct might just slip off from its joint, while other times there might be actual damage to the duct.
Step 4: Clean the Duct Ends
Using a damp cloth, clean both ends of the disconnected duct to ensure there’s no dust or debris. This helps in achieving a more secure connection.
Step 5: Reconnect the Duct
Slide the disconnected end back onto its connecting piece. Ensure it’s snug.
Step 6: Secure the Connection
Metal Screws: If you’re working with metal ducts, use self-tapping screws to secure the connection. Space them evenly around the duct, ensuring they don’t penetrate the inner lining.
Duct Tape: Contrary to its name, traditional duct tape isn’t the best long-term solution due to its adhesive failing over time. Instead, go for mastic sealant or a metal tape designed for ducts. Apply the tape around the joint, ensuring there are no gaps.
Step 7: Seal the Duct
For an extra layer of security, apply a mastic sealant over the tape. Using a putty knife, spread the mastic evenly over the tape, covering the entire circumference of the duct.
Step 8: Inspect Adjacent Ductwork
Since you’re already in the area, take a moment to inspect adjacent ductwork to ensure no other sections are loose or showing signs of disconnecting soon.
Step 9: Test the System
Turn on your HVAC system and check the repaired section. Listen for any escaping air and feel around the joint to ensure there’s no leak.
Step 10: Regular Maintenance
While you’ve fixed the immediate issue, make it a habit to periodically inspect your ductwork, especially if you’ve had a disconnection before. Early detection can prevent more significant problems down the line.
Avoiding Future Disconnects
The design and installation of your ductwork play a crucial role in its longevity and performance. An understanding of how design choices impact the functionality can help homeowners avoid potential issues, like disconnections, in the future.
Here are some insights:
Proper Sizing
Ducts that are too large or too small for your home’s requirements can lead to inefficiencies and increase the chances of wear and tear. Ensuring that ducts are correctly sized for your HVAC system is paramount.
Smooth Transitions
Sharp bends or numerous turns in the ductwork can create pressure points and lead to premature wear. Whenever possible, aim for smoother transitions and fewer bends.
Secure Installations
Using high-quality materials and techniques during installation can prevent future problems. This includes using screws instead of just relying on tape, and ensuring ducts are appropriately supported, especially in long runs.
Material Matters
While flexible ducts are easier to install, they might be more prone to damage or disconnects if not handled properly. On the other hand, metal ducts, though more robust, require proper sealing to prevent leaks.
Regular Inspections
A design that facilitates easy inspection can be a boon. Being able to quickly check your ducts without significant hurdles means you’re more likely to spot and rectify potential issues before they escalate.
In Conclusion
A disconnected air duct can lead to a plethora of issues, from compromised air quality to increased energy bills. However, with the right tools and a bit of patience, fixing the problem can be straightforward.
Remember always to prioritize safety and consider consulting a professional if you’re unsure about the repair process. Regular inspections and maintenance can ensure your duct system remains in top shape, keeping your home comfortable throughout the year.