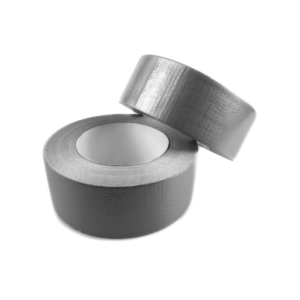
We’ve all been there. You’re eagerly anticipating a good night’s sleep on your air mattress, only to discover a hissing sound that indicates a slow leak. A deflating air mattress can quickly deflate your spirits too. If you find yourself in such a predicament and lack a proper patch kit, don’t fret! One of the most versatile tools you likely have on hand is duct tape.
In this blog post, we’ll guide you through the steps to patch your air mattress with duct tape and get back to a peaceful night’s sleep.
Why Duct Tape?
Duct tape, sometimes affectionately known as ‘the universal fixer,’ is a strong, flexible, and adhesive tape. Its water-resistant nature makes it a temporary solution to patch holes or tears.
While it might not be a permanent fix for your air mattress, it’s a reliable short-term solution, especially when you’re in a pinch.
Read More: How Often to Clean Your Air Duct
Step-by-Step Guide to Patching an Air Mattress with Duct Tape:
Navigating a punctured air mattress can be daunting, but with the following step-by-step guide, you’ll learn how to effectively use duct tape to seal that pesky leak and restore your comfortable sleeping surface.
Step 1: Deflate the Mattress Completely
Before starting the repair process, ensure your air mattress is completely deflated. This makes it easier to identify the source of the leak and ensures a flat surface for the tape to adhere to.
Step 2: Identify the Source of the Leak
This is crucial. A good method is the soapy water test. Mix a few drops of dish soap with water in a spray bottle and spritz it over the suspected area. Bubbles will form if there’s a leak. Wipe the area dry once identified.
Step 3: Clean and Dry the Area
Thoroughly clean the punctured area with a damp cloth, removing any dirt or debris. Ensure it’s completely dry before moving on. An alcohol wipe can also be useful to remove any grease or oils that could interfere with the tape’s adhesion.
Step 4: Cut a Generous Piece of Duct Tape
Cut a piece of duct tape that’s larger than the hole or tear. This ensures the leak is fully covered and the tape has a solid grip on the mattress surface. Round the edges of the tape with scissors; this reduces the chances of the tape peeling off.
Step 5: Apply the Duct Tape
Place the duct tape over the hole, ensuring you smooth it out to avoid any wrinkles or air bubbles. Press firmly, paying extra attention to the edges, to ensure it sticks well.
Step 6: Reinforce If Necessary
For larger holes or tears, consider using multiple layers of duct tape. This provides added strength and security. Remember, always smooth out each layer to maximize adhesion.
Step 7: Inflate the Mattress
Once the patch is securely in place, inflate the mattress. Listen closely to the patched area to ensure no air is escaping. If you hear a hiss, you might need to add more tape or adjust the existing patch.
Step 8: Test the Repair
Before diving into a deep slumber, give the mattress some time – an hour or so – to ensure the patch holds. If it remains inflated, you’ve successfully patched your mattress!

Tips for a Successful Duct Tape Patch
To ensure the longevity and effectiveness of your duct tape patch, consider these essential tips that can make all the difference in your repair process.
- Use Quality Duct Tape: Not all duct tapes are created equal. For best results, use high-quality, heavy-duty duct tape.
- Check Both Sides: If you can’t find the leak on the top surface, it might be on the bottom. Always check both sides.
- Temporary Solution: Remember, duct tape is a temporary fix. To prolong the life of your air mattress, consider investing in a proper patch kit or seeking professional repair in the future.
- Avoid Over-Inflating: Over-inflating the mattress can strain the patched area. Inflate to a comfortable level, but not to the point where the mattress is taut.
- Avoid Direct Sunlight: Prolonged exposure to direct sunlight can weaken the adhesive quality of the duct tape, making it less effective over time. If possible, position your mattress in a shaded area or ensure it’s not under the sun for extended periods.
- Store Spare Tape: Always keep some extra duct tape on hand, especially if you’re traveling or camping. This ensures you’re prepared for any unexpected punctures and can address them immediately without any hassle.
In Conclusion
Duct tape, with its myriad uses, comes to the rescue again! Patching an air mattress with duct tape can be a lifesaver, especially when other resources are unavailable. While it’s not a long-term solution, it can certainly tide you over until you get a proper patch kit or a new mattress. Next time you find yourself sinking into despair (and your deflating mattress), remember that with a bit of duct tape ingenuity, you can float right back to dreamland.

